Migrating a standalone Orchard site to DotNest - Show Orchard case study
Show Orchard is a website for showing representative Orchard CMS (and now Orchard Core) websites all around the internet. It was started by Ryan Drew Burnett, but since he doesn't work with Orchard anymore, as announced earlier it is now maintained by our team at Lombiq Technologies. Our first task was to migrate it to DotNest, so here we are, see how we did it using basic Orchard features and Media Theme.
Update as of 16.10.2023: Show Orchard now runs on Orchard Core, and you can check out the corresponding more recent case study here.
This is a guest post by Márk Bartha, software engineer at Lombiq.
Click here to open the repository page of the theme project.
Original theme: RDB.ShowOrchard.zip
Original module: RDB.Showtime.zip
How to start moving your standard Orchard website to DotNest
So let's say you already have a standard Orchard website with a custom theme and maybe some simple custom modules and you want to move it to DotNest. You probably have a couple of content types (e.g. Pages, BlogPosts or other custom types created in Migrations) that you need to recreate. So the first step would be to use the ImportExport module to create an export file that includes everything you need on your new Orchard website. And then do some planning and find out what other widgets, queries etc. you need to have the same functionality as you implemented in your standard Orchard theme and modules. After that you can head over to DotNest and create your site. After setting up the site, importing your recipe and creating your custom items you can start theming.
We did the same too (see the ShowOrchard.recipe.xml file in the Recipes folder of the theme repository) so now we have the following:
-
Category TaxonomyTerm to categorize Websites,
-
Website content type with TitlePart, AutoroutePart, BodyPart and WebsitePart that includes the following fields:
-
Category: TaxonomyField for selecting Category term
-
Developer: LinkField to reference the developer or company that created the website
-
Interview: BooleanField that indicates whether the developer or company has been interviewed about their website, it will be used for a Query on a Page to show
-
Screenshot: MediaLibraryPickerField to display a screenshot of the website
-
Website: LinkField to reference the actual website
-
-
configured PageSize on SiteSettingsPart,
-
index for categories which is configured in the SearchSettingsPart and there are commands for initialization,
-
different Queries for Websites, Interviews and there are two special ones for the "Website Stepper" which will be described later in the article,
-
and finally the actual content items from the old site including Websites, Layers etc.
After you have all the content types and queries created on DotNest you are ready to start Media Theme development. In your theme you probably had some custom shapes, mostly shape overrides so you need to recreate them using Liquid. When you are done with that and all seems good you can start working on your custom implementations if necessary. These custom implementations replace the simple features coming from custom modules with basic Orchard features or some code that works in Razor but won't work in Liquid.
Let's see some interesting features that were on the original Show Orchard websites and how we implemented them on DotNest.
Related Websites widget
If you check any Website on Show Orchard, you will see a grid on the bottom containing similar websites in the database.
To implement this we needed to create a Query that will search for websites with the same category as the one currently displayed but somehow exclude the currently displayed one.
Search filter was used with the {Request.Content.Fields.WebsitePart.Category.Terms} search query to match the category, ContentTypes filter to match the Website content type and CreatedUtc filter to exclude the currently displayed Website. This last one is a workaround because there is no way to filter for content IDs so we had to filter for the creation date. Which also was tricky since Orchard will localize any date you give in the form of the filter so when you give {Request.Content.Date} in the input the evaluated date will be UTC but it will be localized by the filter. Unfortunately, this won't work because the localized date can't be compared to the UTC create date of other Websites so the currently displayed website will be in the query result - except if the timezone set in Orchard is UTC.
The solution was to use intervals and knowing that at most one website will be added per day we could exclude all items that has been created between {Request.Content.Date.Format:yyyy-MM-dd} 0:00 and {Request.Content.Date.Format:yyyy-MM-dd} 23:59.
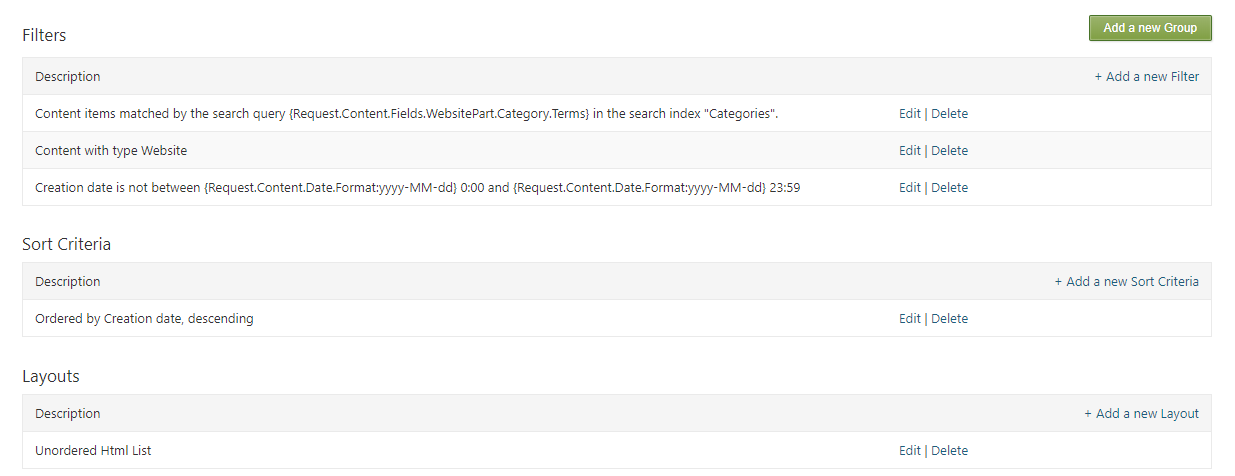
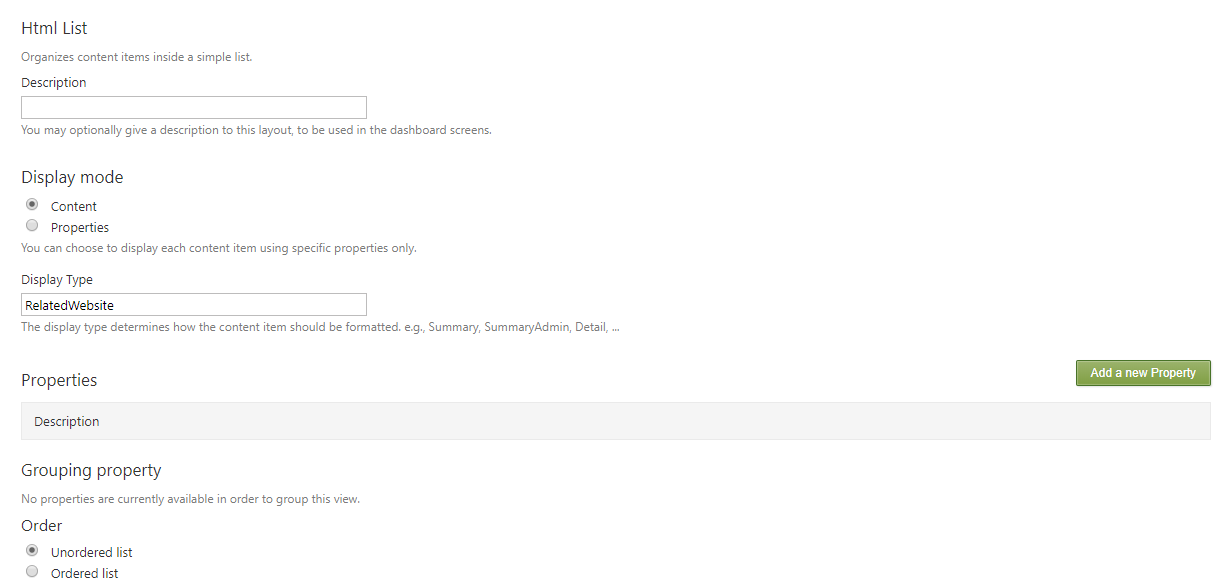
For the layout we used an unordered HTML list where we specified the RelatedWebsite as display type.
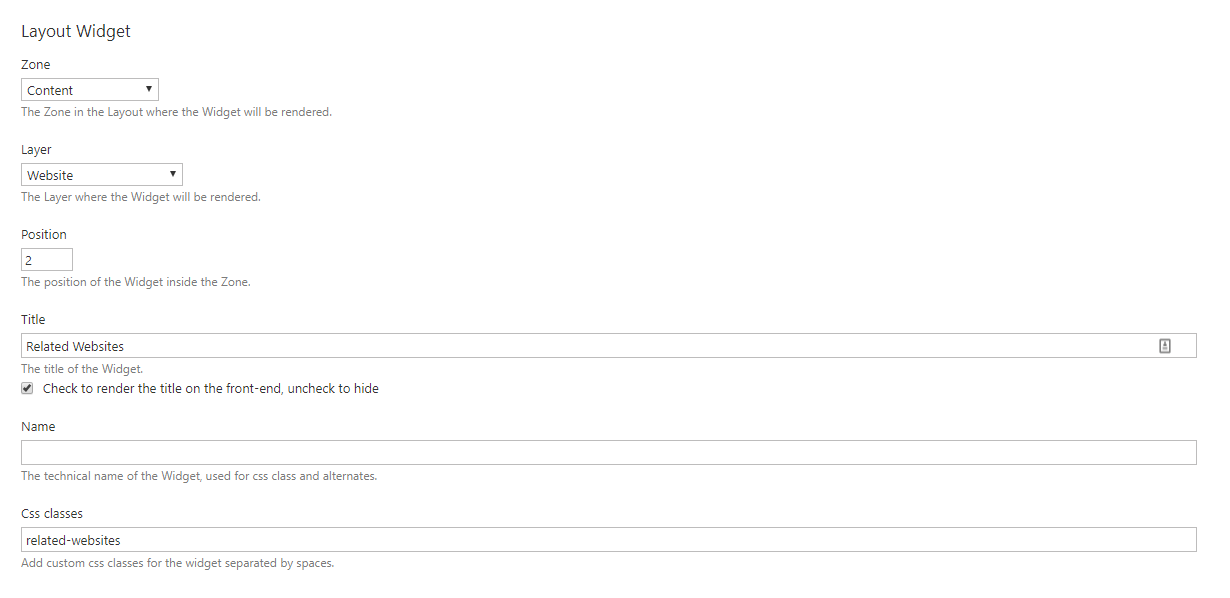
LayoutWidget was used to display the Query results. Also related-websites class was added for styling purposes. The layout itself was pretty simple, the QueryElement was added inside the grid layout elements.
Website stepper
Another exciting challenge was to add two links that will display the title of the website created before and after the currently displayed website - which actually behaves like "Next" and "Previous" pager buttons.
Our solution was to use two different queries for those. One for filtering websites created before the currently displayed site and one for after. The problem was the same as before, we couldn't use the {Request.Content.Date} alone since the timezone conversion would change it and one of the query results might contain the currently displayed content item too. The final solution was similar as the one used for the Related Websites, we used the {Request.Content.Date.Format:yyyy-MM-dd} 0:00 and {Request.Content.Date.Format:yyyy-MM-dd} 23:59 parameters.
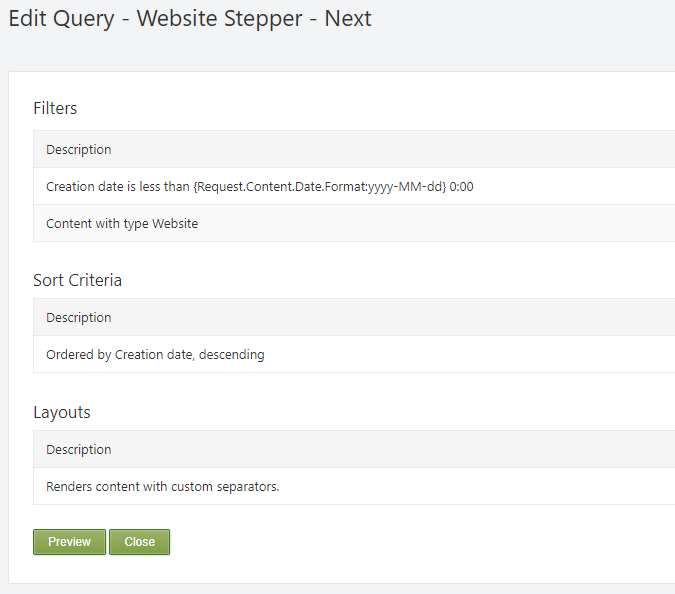
We used raw layout with "WebsiteStepperNext" and "WebsiteStepperPrevious" display types given so we could easily override the Query results.
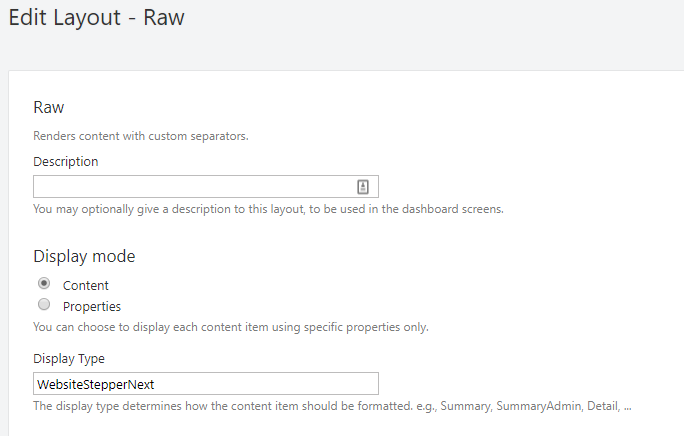
LayoutWidgets were used to render the first item found in each query.
In the Content-Website.WebsiteStepperNext.liquid and Content-Website.WebsiteStepperPrevious.liquid we overrode the content item shapes to contain only the title as links to the websites.
<a href="{% Href Model.ContentItem.AutoroutePart.DisplayAlias %}" class="website-stepper next-stepper btn btn-default pull-right">
    {{ Model.ContentItem.TitlePart.Title }} →
</a>
Displaying interviews in a custom zone
If a website has interview content we needed to display it right after the content metadata, however, we couldn't use the Content zone because it was displayed right before the Meta zone. In Liquid we could easily display custom zones. After this we can target shapes to this zone in the Placement.info. This is the content of the Content.Website-Detail.liquid file:
<article class="content-item content-item-detail website website-detail">
    <header class="content-item-header">
        {{ Model.Header | Display }}
    </header>

    {{ Model.Content | Display }}

    <div class="content-item-meta">
        {{ Model.Meta | Display }}
    </div>

    {% if Model.Interview != null %}
        {{ Model.Interview | Display }}
    {% endif %}
</article>
Using Bootstrap classes everywhere
As you may noticed the previous markups all contain Bootstrap classes. To use Bootstrap classes we needed to override a few more shapes. The most interesting ones are the Navigation-related shapes because these are pretty tricky ones even in the original .cshtml files.
The menu name was "Main Menu" so we could use the related alternate. The Menu-main-menu.liquid shape was pretty simple, the DisplayChildren liquid tag could be used on the Model object using nav tag and the Bootstrap nav class.
<nav>
    <ul class="nav">
        {{ Model | DisplayChildren }}
    </ul>
</nav>
The MenuItem-main-menu.liquid shape was a bit more complicated because we had to add specific classes to list items and also handle multi-level menu items.
{% assign activeClass = "" %}
{% assign dropdownClass = "" %}
{% assign subMenuItemCount = Model.Items | Size %}
{% assign menuText = Model.Text | Strip %}

{% if Model.Selected %}
    {% assign activeClass = "active" %}
{% endif %}

{% if subMenuItemCount > 0 %}
    {% assign dropdownClass = "dropdown" %}
{% endif %}

<li class="{{ activeClass}} {{ dropdownClass }}">
    {% if subMenuItemCount > 0 %}
        <a class="dropdown-toggle" data-toggle="dropdown" href="{% Href Model.Item.Href %}" role="button" aria-haspopup="true" aria-expanded="false">
            <span class="dd-caret">{{ Model.Item.Text }}</span>
        </a>
    {% else %}
        <a href="{{ Model.Item.Href }}">{{ Model.Item.Text }}</a>
    {% endif %}

    {% if subMenuItemCount > 0 %}
        <ul class="dropdown-menu">
            {{ Model | DisplayChildren }}
        </ul>
    {% endif %}
</li>
Go and check further .liquid files to see how we override some more shapes such as Layout.liquid, Elements/Column.liquid and Elements/Grid.liquid etc.
Using resources
To include any stylesheets and shapes we used a Resources.liquid file. Here we also added some meta tags. Fortunately, it was really easy to do it using Liquid.
{% SetMeta, Name: "viewport", Content: "width=device-width, initial-scale=1.0" %}
{% SetMeta, HttpEquiv: "X-UA-Compatible", Content: "IE=edge,chrome=1" %}

{% ScriptRequire "jQuery", head %}
{% Script "~/Core/Shapes/Scripts/html5.js", head %}
{% Script "~/Themes/Lombiq.PrettyGoodBootstrapBaseTheme/Content/Bootstrap/dist/js/bootstrap.min.js", head %}

{% Style "//fonts.googleapis.com/css?family=Raleway:400,700" %}
Conclusion
Migrating Show Orchard to DotNest is a pretty good example of how to move our simple Orchard website to DotNest where we don't need to worry about deployment processes or server operations anymore. Most of the migrations can be easily done using ImportExport, however theming needs some further work on reimplementing the same markup and adjusting the styling if necessary.